Import a palette
Extract colors from an image and save a reusable Pixart palette asset.
Use Palette > Import Palette… inside Pixart, or Create > Pixart > Import Palette… in the Project window. You don't need an open sprite. If a texture is selected in the Project window, Pixart starts with that image.
This saves a Pixart palette .asset directly. There is no intermediate sprite to create or export.
The Maximum colors and Alpha cutoff sliders keep the last preview visible while you drag. Release the slider to recalculate the colors and preview.
Tutorial: make a palette from a sprite sheet
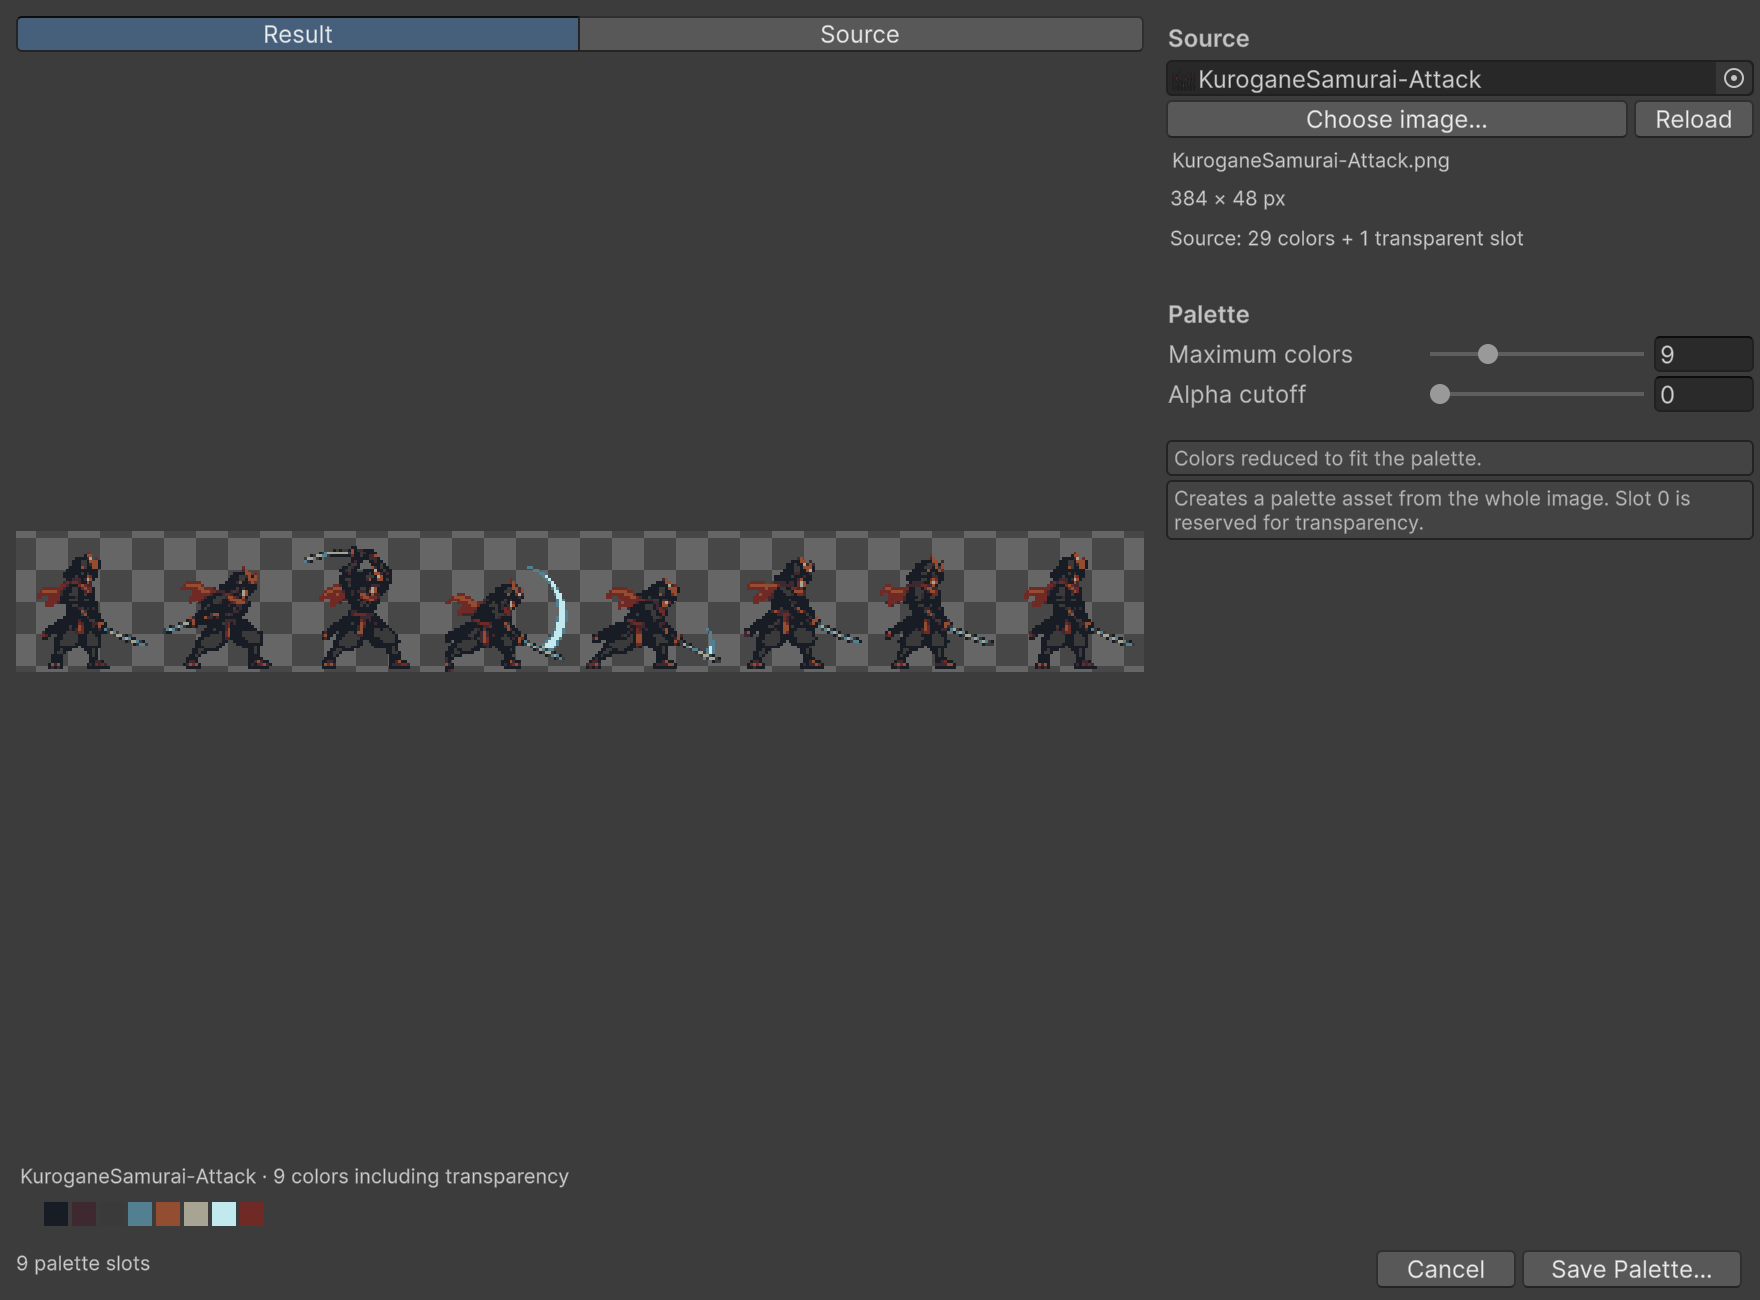
- Open Import Palette and choose an image. You can use the KuroganeSamurai attack sheet for this example.
- Set Maximum colors to 9 to try an eight-color version, plus transparency.
- Compare Source with Result. The Result shows the image using the proposed palette; the swatches underneath are the colors that will be saved.
- Click Save Palette… and save it under
Assets, for example asSamurai Palette.asset. - Open a sprite and choose Palette > Set Palette… to use the new asset.

Saving does not assign the new palette to your current sprite. This lets you extract and compare palettes without recoloring an open document.
Exact colors or a reduced palette?
Maximum colors counts all slots, including transparency. A value of 17 allows up to 16 visible colors. The slider starts at the source’s detected number of distinct nontransparent RGBA colors plus one transparent slot, clamped to 2–256. This is also its maximum; lower it to make a reduced palette. Reload preserves your chosen limit when possible and clamps it to the new source’s maximum.
If the source colors fit, their RGBA values are preserved exactly. Duplicates use one slot. Colors are discovered left-to-right, top-to-bottom, so a simple palette-strip image keeps its order after transparent slot 0.
If there are too many colors, Pixart reduces them to representative colors from the image. A photograph works too; lower the limit and compare the swatches until you have a useful starting point. Large areas of one color influence the result more than a few isolated pixels.
The whole image is scanned, even when the preview is smaller. A sprite sheet doesn't need slicing: colors from all its frames contribute to the palette. This also includes an opaque background or any labels in the source image, so crop those out first if you don't want their colors.
Transparency
Slot 0 is always transparent. Fully transparent pixels don't contribute their hidden RGB values to the palette.
Alpha cutoff excludes pixels whose alpha is at or below the value you choose. Keep it at 0 to preserve partial transparency. Raise it if you don't want faint antialiased edge colors. A completely transparent image produces a palette with just slot 0.
There is no dithering option here; dithering changes pixel placement, not the saved palette colors. To import the image itself with dithering, use image import.
Use and share the result
The saved asset behaves like any shared palette. Assign it to several sprites and edits to that palette can recolor all of them.
Assigning a palette preserves pixel indices; it doesn't remap old colors to the nearest new color. A palette with too few slots for the sprite's used indices can't be assigned. For new artwork, choose the palette before drawing. To convert existing image pixels into a reduced palette, use image import instead.
Palette import accepts the same image sources and source-size limits as image import. The sprite canvas-size limit doesn't apply because no sprite is created.