Import images & sprite sheets
Turn an image or sprite sheet into an editable Pixart asset.
Choose File > Import… inside Pixart, or right-click in the Project window and choose Create > Pixart > Import…. Both open the same import window. If a texture is selected in the Project window, it is loaded for you.
Import creates a new .pixart asset with one layer and a local palette. An image becomes one frame; a sprite sheet becomes several frames. It doesn't replace or append to the document you have open.
The Maximum colors and Alpha cutoff sliders keep the last preview visible while you drag. Release the slider to recalculate the colors and preview.
Import a single image
- Drag a Unity texture into Source, or click Choose image… for a PNG or JPEG on disk.
- Set Import as to Single image.
- Leave Resize frames off to keep the original dimensions. For pixel art, use Nearest neighbor if you need to resize.
- Leave Maximum colors at its detected default to preserve as many source colors as the palette can hold, or lower it to reduce the palette.
- Check the Result preview and palette swatches. Compare with Source / slicing if colors have been reduced.
- Set Pixels per unit, then click Import… and choose a new asset name under
Assets.
The new sprite opens in Pixart, ready to paint. PNG/JPEG imports read the original file, so you don't need to change its Unity compression or Read/Write setting first. JPEG doesn't carry transparency; a white background in a JPEG stays part of the image.
Tutorial: import KuroganeSamurai's attack sheet
Use this eight-frame attack sheet, assembled from the supplied KuroganeSamurai sample’s eight numbered Attack poses, or follow along with your own sheet.

- Open Import and choose the PNG.
- Set Import as to Sprite sheet — grid.
- Enter 48 for Frame width and Frame height. Leave Left/Top margin and both spacing values at 0 for this example.
- Keep Maximum colors at its detected default and set Frames per second to 10.
- Open Source / slicing. The eight cells should line up with the eight poses. Click a cell to select it.
- Switch to Result and use the Frame slider to check each pose.
- Click Import and save as
KuroganeSamuraiAttack.pixart.
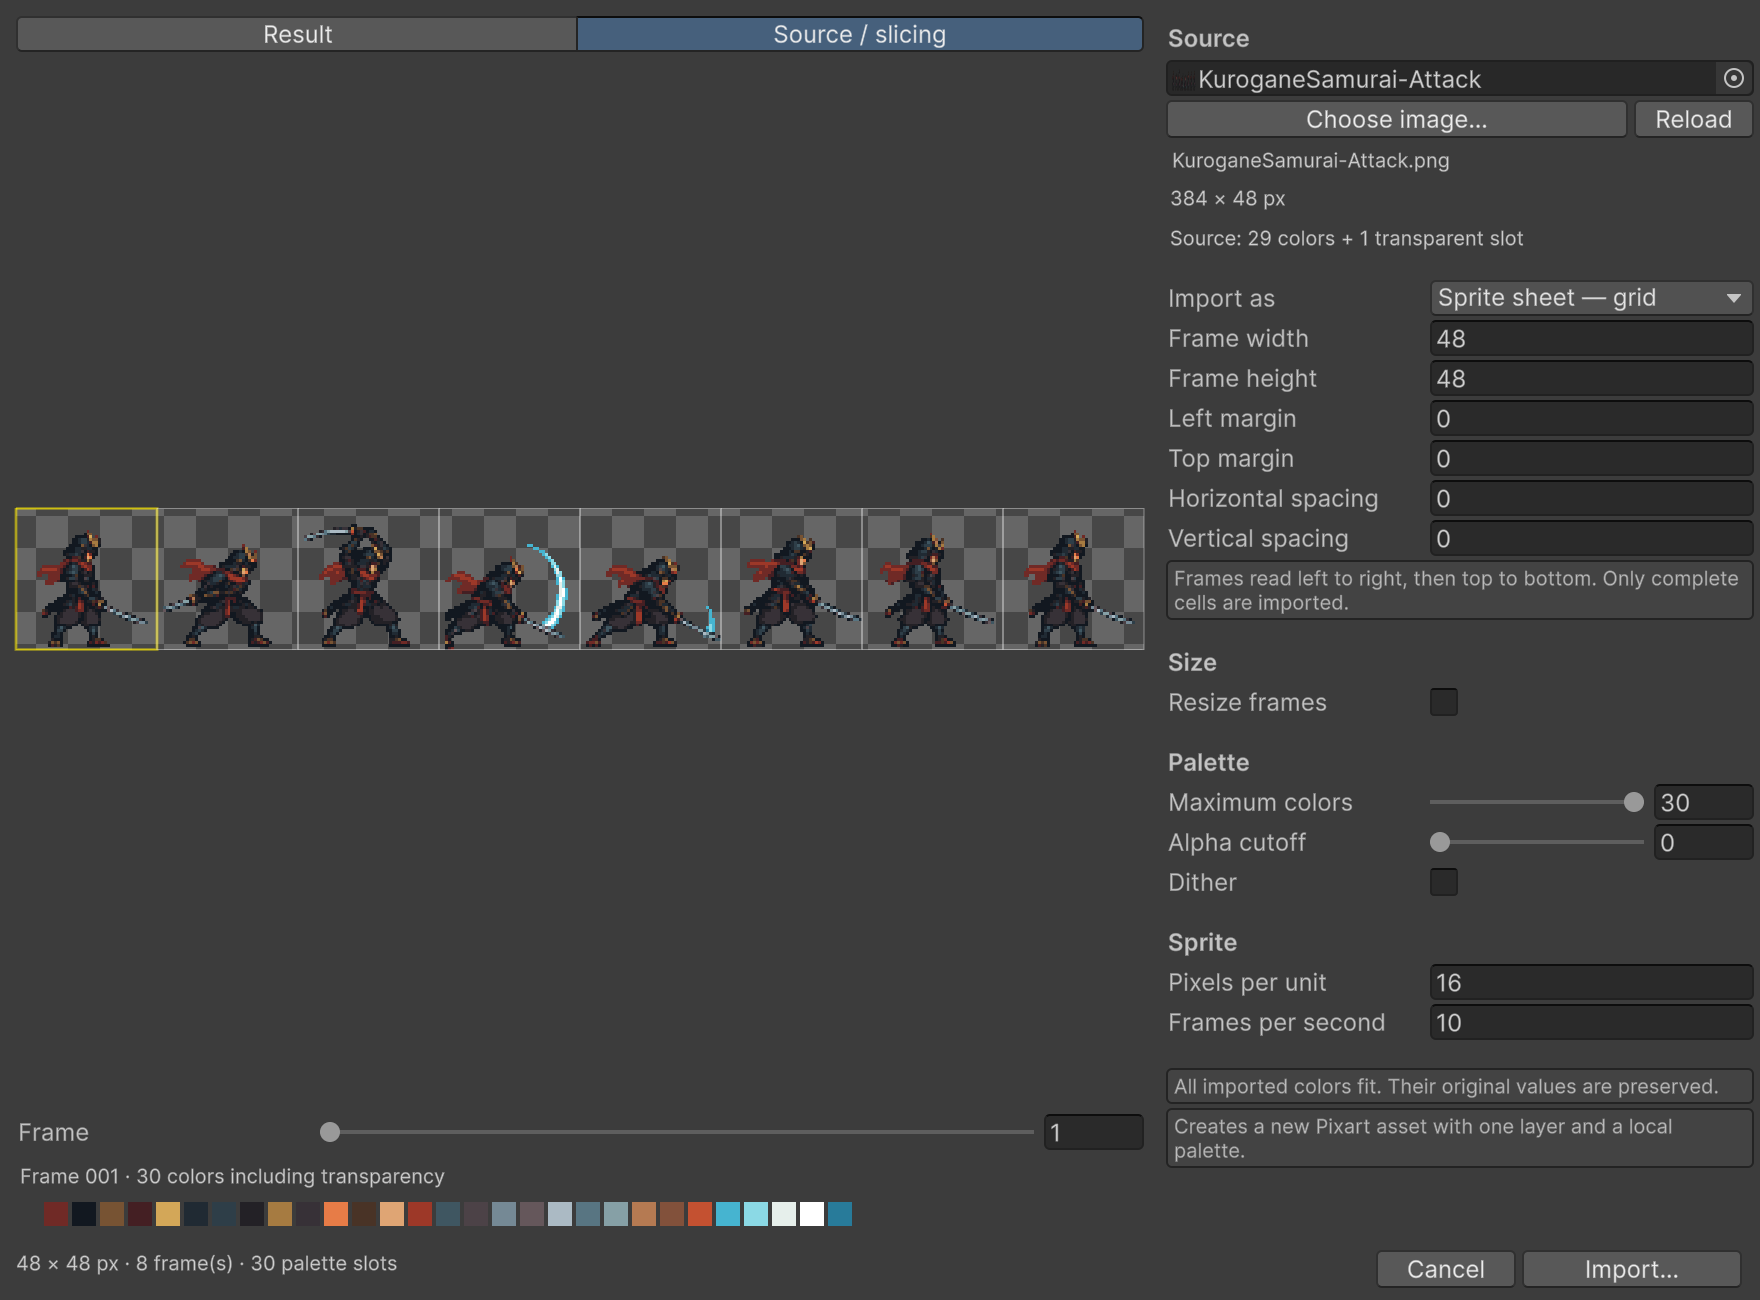
Frames are read left-to-right, then top-to-bottom. Only complete grid cells are imported; leftover pixels at the right or bottom are excluded. The preview reports this when it happens. Blank cells still become blank frames.
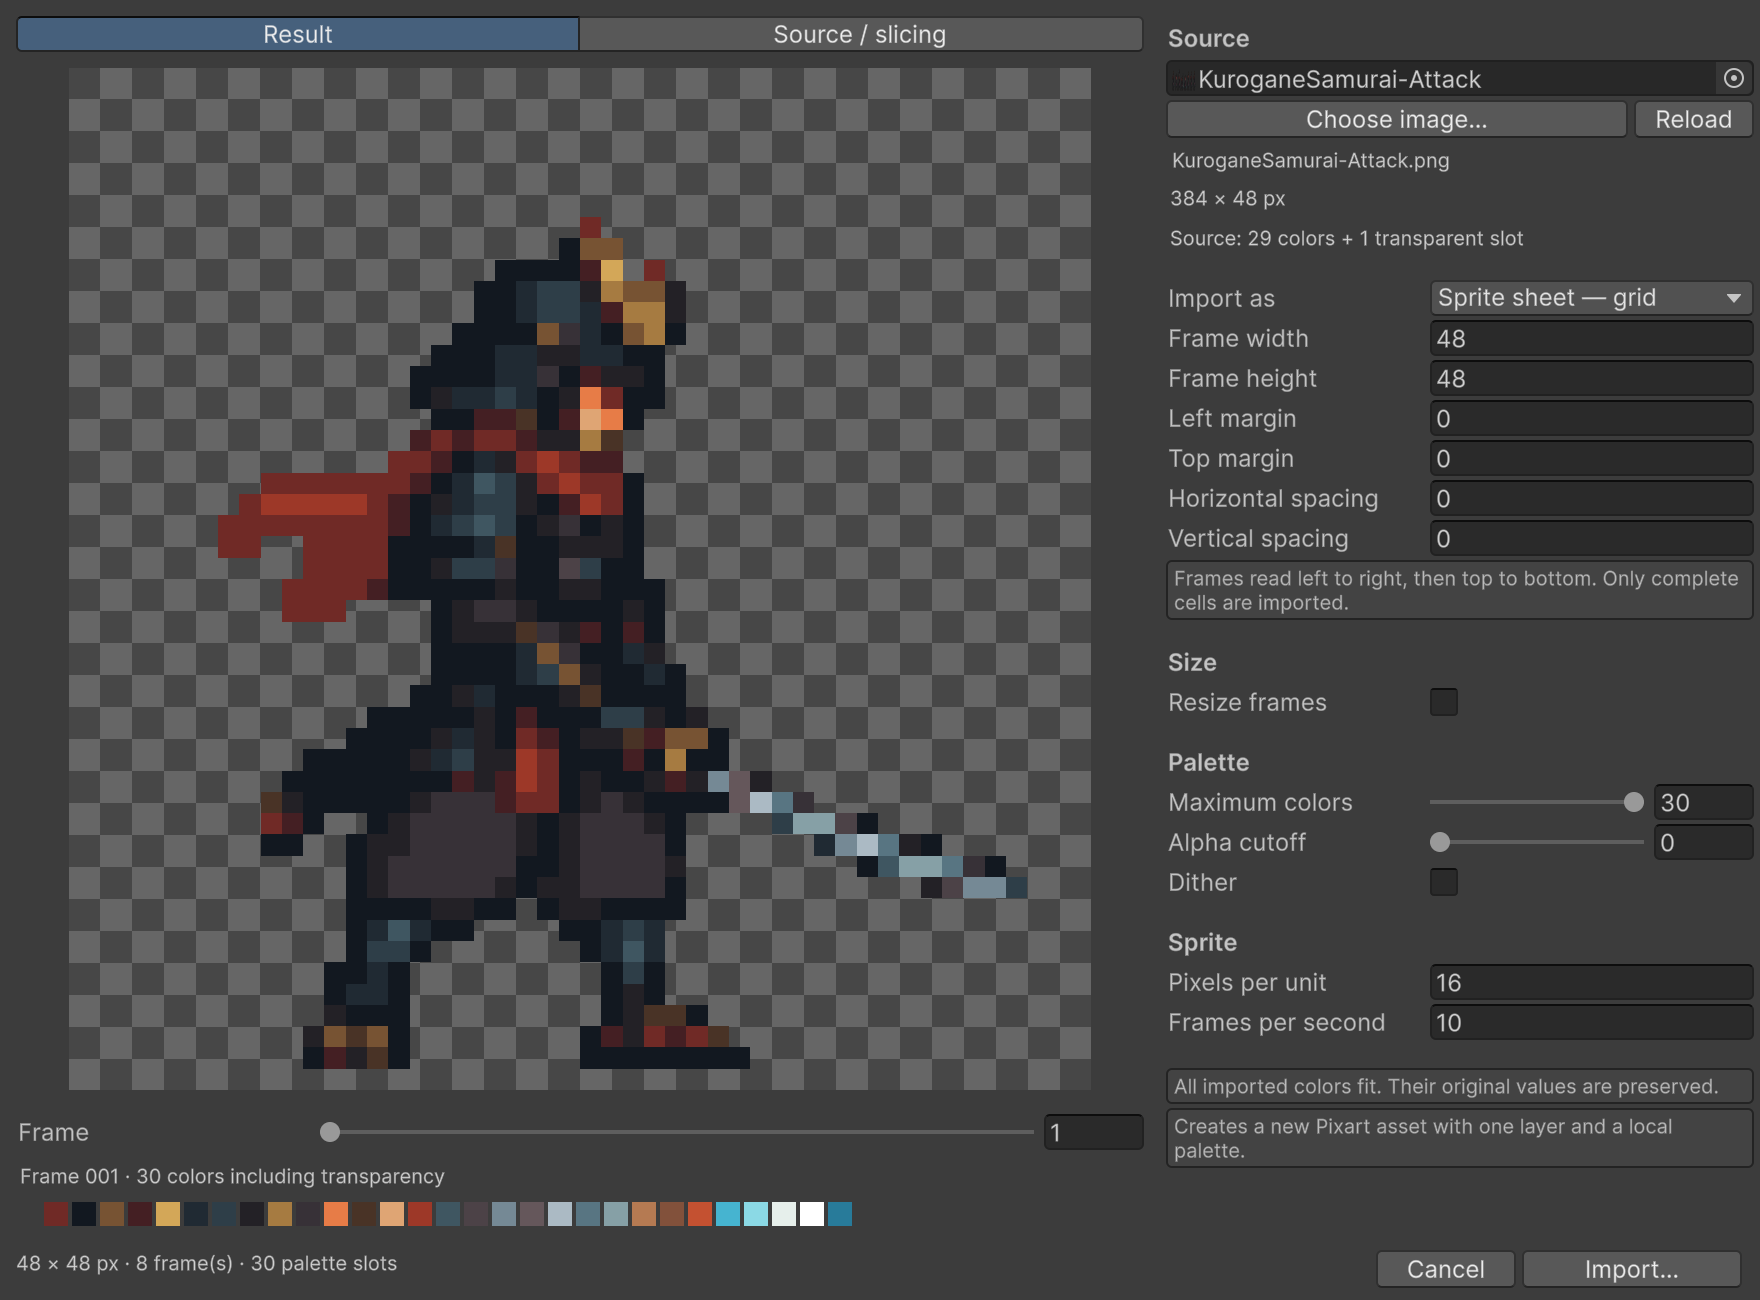
After import, press P to preview. To name the sequence, create an Attack range covering frames 1–8 and set its mode to Once. A sheet provides images, not animation metadata: ranges and original per-frame holds aren't recovered from the PNG. Set them in Frames & animation.
Use existing Unity slices
For a texture already sliced in Unity's Sprite Editor, choose Unity sprite slices. Pixart uses those rectangles and names, sorted from top to bottom and left to right. This mode is selected automatically when the source has slices.
If the slices have different sizes, they are centered on a canvas large enough for the largest slice. The result uses one Pixels per unit value and a centered pivot; per-slice Unity pivots aren't copied. Only the selected slice rectangles contribute artwork to the imported palette.
Color limits and transparency
Maximum colors is the total number of palette slots, including reserved transparent slot 0. For example, 17 allows 16 visible colors plus transparency. Loading a source sets the default and slider maximum to its number of distinct nontransparent RGBA colors plus one transparent slot, clamped to 2–256. Lower the value to reduce colors. Reload keeps your chosen value when possible and clamps it if the source now has fewer colors. The source count is measured before slicing, resizing and alpha cutoff, so the resulting palette can use fewer slots.
When the imported colors fit, Pixart keeps their exact RGBA values. When they don't, it builds a reduced palette and maps the pixels to it. This works across the whole imported sequence, rather than generating a different palette for each frame.
Alpha cutoff makes pixels at or below the chosen alpha fully transparent. At 0, partial transparency is preserved. Raise it to remove faint edge pixels; 255 removes everything. This is an alpha threshold, not background-color removal.
Dither adds a fine pattern when colors need reducing. It can help gradients, but often adds unwanted noise to a small character. Leave it off for clean sprite edges and turn it on when the preview benefits from it.
Importing a photograph or painted image
Start with Resize frames enabled, reduce the dimensions, and try a palette of 16–64 slots. Smooth is useful for shrinking detailed source images; Nearest neighbor preserves hard pixel edges. Compare the preview with Dither off and on.
The result is a smaller, indexed image. You may still want to simplify silhouettes or clean up details with the painting tools. If you only want its colors, use Import Palette instead.
Source and output limits
Source images can contain up to 16,777,216 pixels, with at most 16,384 pixels per side. PNG/JPEG files are limited to 64 MiB. Resize the source externally if it exceeds those limits; the importer's Resize option applies after loading it.
An imported frame can be 1–4096 pixels per side, with up to 4096 frames per import. A large sheet can reach the document's total memory limit before these individual limits. Reduce the frame count or output dimensions if the preview reports that.
Use Reload after changing the source image outside Pixart. Importing makes a separate editable copy; it does not keep a live link back to the source PNG or JPEG.