Your first sprite
Draw a 16×16 potion and put it in a Unity scene.
Let's draw a small potion bottle with the default palette, two layers and the 1 px pencil, then put it in a scene.
If you'd rather inspect the result first, download Potion.pixart and drop it into a folder under Assets. The download also contains the four frames from the animation tutorial.
1. Create the asset
Right-click in the Project window and choose Create > Pixart > Sprite. Name it Potion, then double-click it.
New assets start at 32×32. Open Sprite > Canvas Size…, set Width and Height to 16, keep Canvas: crop / expand, and click Apply to All Frames. There are no pixels to crop yet. Leave Pixels per unit at 16 and Pivot at 0.5, 0.5.
Press F over the canvas to fit it. Turn on Pixel Grid using its icon near the right end of the top menu bar, or View > Pixel Grid.
2. Draw the bottle
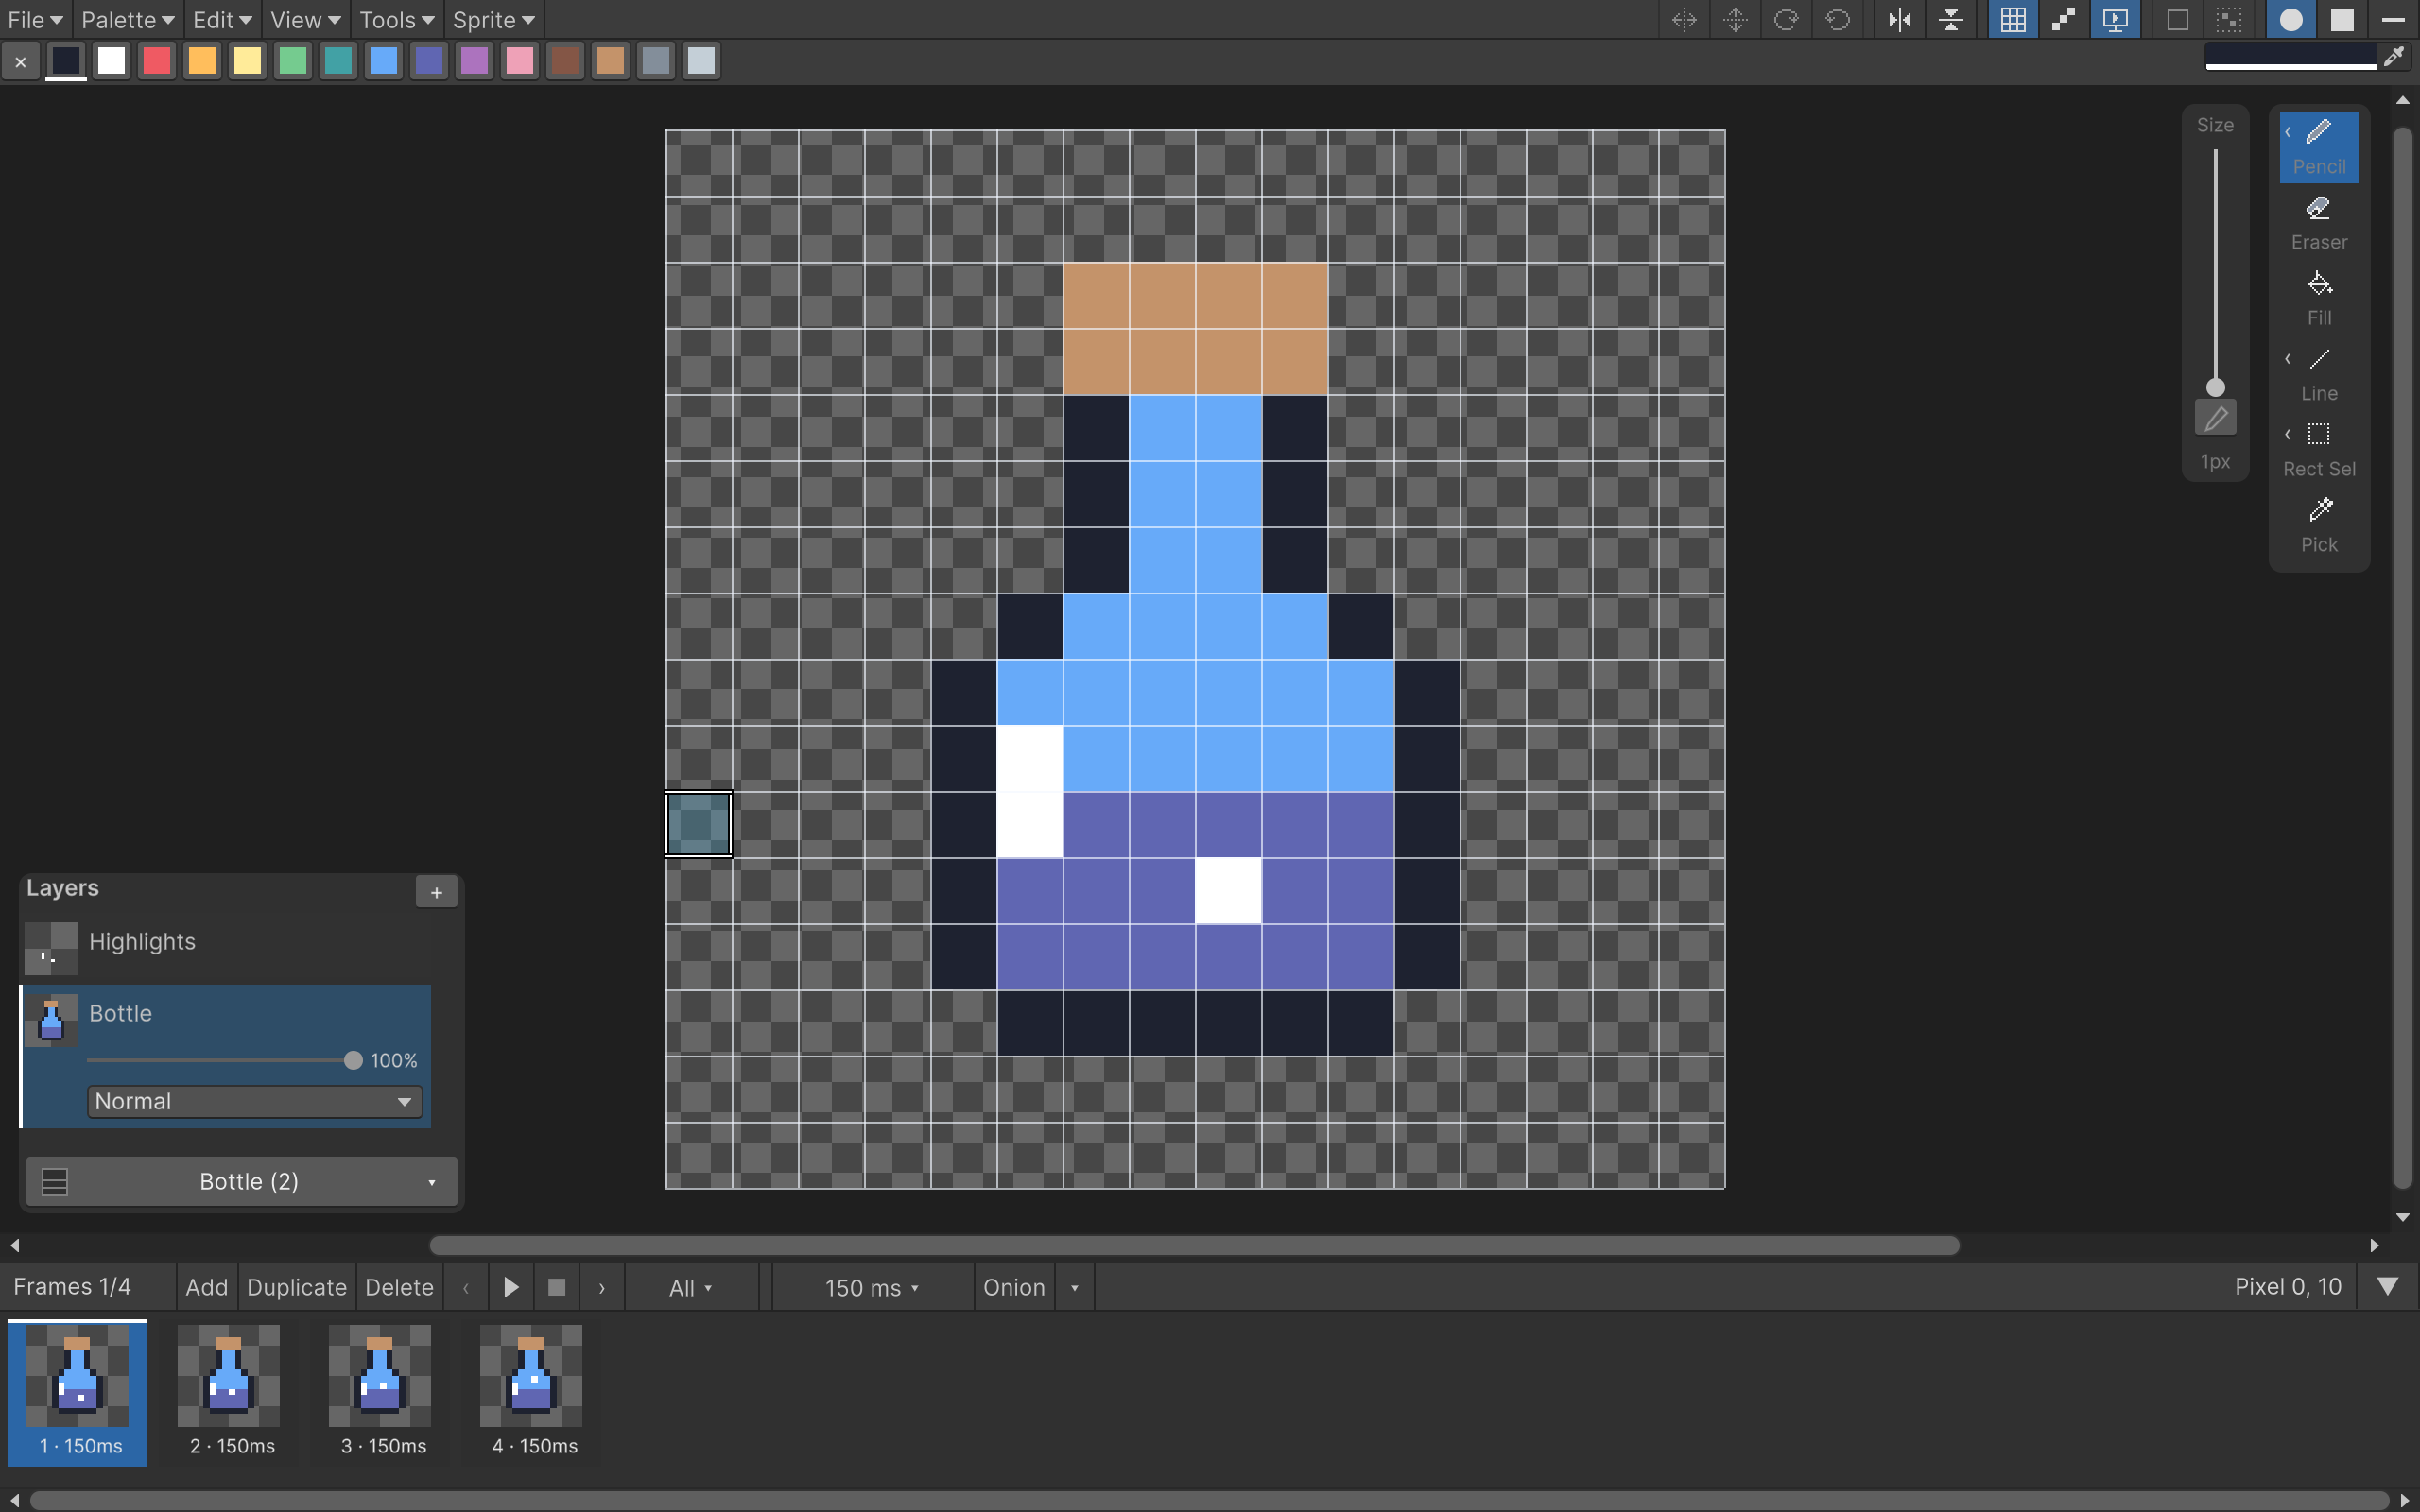
Select Pencil with B, and bring Size down to 1 px. The palette already has the colors we need: dark outline, light blue glass, blue-purple liquid, light brown cork and white highlights.
Draw a narrow neck, widen it into a bottle, and close the bottom. Use G to fill the inside with light blue. Then use Pencil to put a few rows of purple liquid near the bottom and a brown cork at the top.
For an exact copy, here is the bottle before highlights. Each character is one pixel; the top line is the top of the canvas. . is transparent, D is the dark swatch, C light brown, a light blue and v blue-purple.
................
................
......CCCC......
......CCCC......
......DaaD......
......DaaD......
......DaaD......
.....DaaaaD.....
....DaaaaaaD....
....DaaaaaaD....
....DvvvvvvD....
....DvvvvvvD....
....DvvvvvvD....
.....DDDDDD.....
................
................
You can hold Alt and click a painted pixel to pick its palette slot. E selects Eraser. If a stroke goes wrong, Cmd/Ctrl+Z undoes it.
3. Add highlights on another layer
Open the Layers overlay at the bottom-left of the canvas. Double-click Layer 1 to rename it Bottle, then press + to add a layer above it. Name the new layer Highlights.
Choose white and paint a two-pixel vertical highlight near the left side of the bottle, plus one small bubble in the liquid. In the downloadable version, the highlight is at (5,9) and (5,10), and the first bubble is at (8,11). Coordinates start at zero in the top-left; you can read them beside the frame-strip fold button.
4. Put it in your scene
Save with Cmd/Ctrl+S, then choose Sprite > Create Scene Object. Pixart adds a GameObject with a Pixart Live Previewer and SpriteRenderer, and assigns your asset.
Select that object in Unity and frame it in the Scene view. At 16 pixels per unit, a 16×16 canvas covers one Unity unit. For a 2D scene, view it along the Z axis; a camera at Z = -10 looking forward is a simple starting point.
Keep the Pixart window open and change a pixel. The scene object updates while View > Live Preview and the component's Live Preview are enabled. Save again when you're happy with it; the build uses the saved artwork.
You now have an editable source asset and an object using it. Next, animate the bubble, or export the potion as a regular PNG.