
Edit multiple frames & layers
Paint and transform several frames, layers, or both in one operation.
Select the frames and layers you want to change, then use the canvas as usual. Pixart applies the operation to every selected frame/layer combination, keeping each one's pixels separate.
Three selected frames and two selected layers means six editing targets. A drawing gesture or completed transform is one undo step for the set.
Select the targets
| Input | Frames | Layers |
|---|---|---|
| Click | Select only this frame | Select only this layer |
| Cmd/Ctrl-click | Toggle one frame | Toggle one layer |
| Ctrl/Cmd-drag | Select a span from the pressed frame to the pointer | — |
| Shift-click | Select a contiguous range | Select a contiguous range |
| Cmd/Ctrl+Shift-click | Add a range | Add a range |
For frames, hold Ctrl (or Cmd on macOS), press a thumbnail and drag across the strip. The selection grows or shrinks with the pointer, replacing the previous frame selection. The endpoint becomes the active frame, so you can watch the poses as you drag. Moving back past the starting frame selects in the other direction. Release to keep the span.
The active frame is the one displayed on the canvas. Other selected frames are still edited even though you aren't looking at them. The layer overlay shows how many layers are selected when there is more than one.
Choose your frames before drawing a canvas selection. Switching layers, or adding/removing layers from the selected set, keeps the same mask on every new target. Floating pixels are committed on the old targets first; the new layers use their own pixels inside that mask. Changing the active frame or the selected frame set still clears the mask.
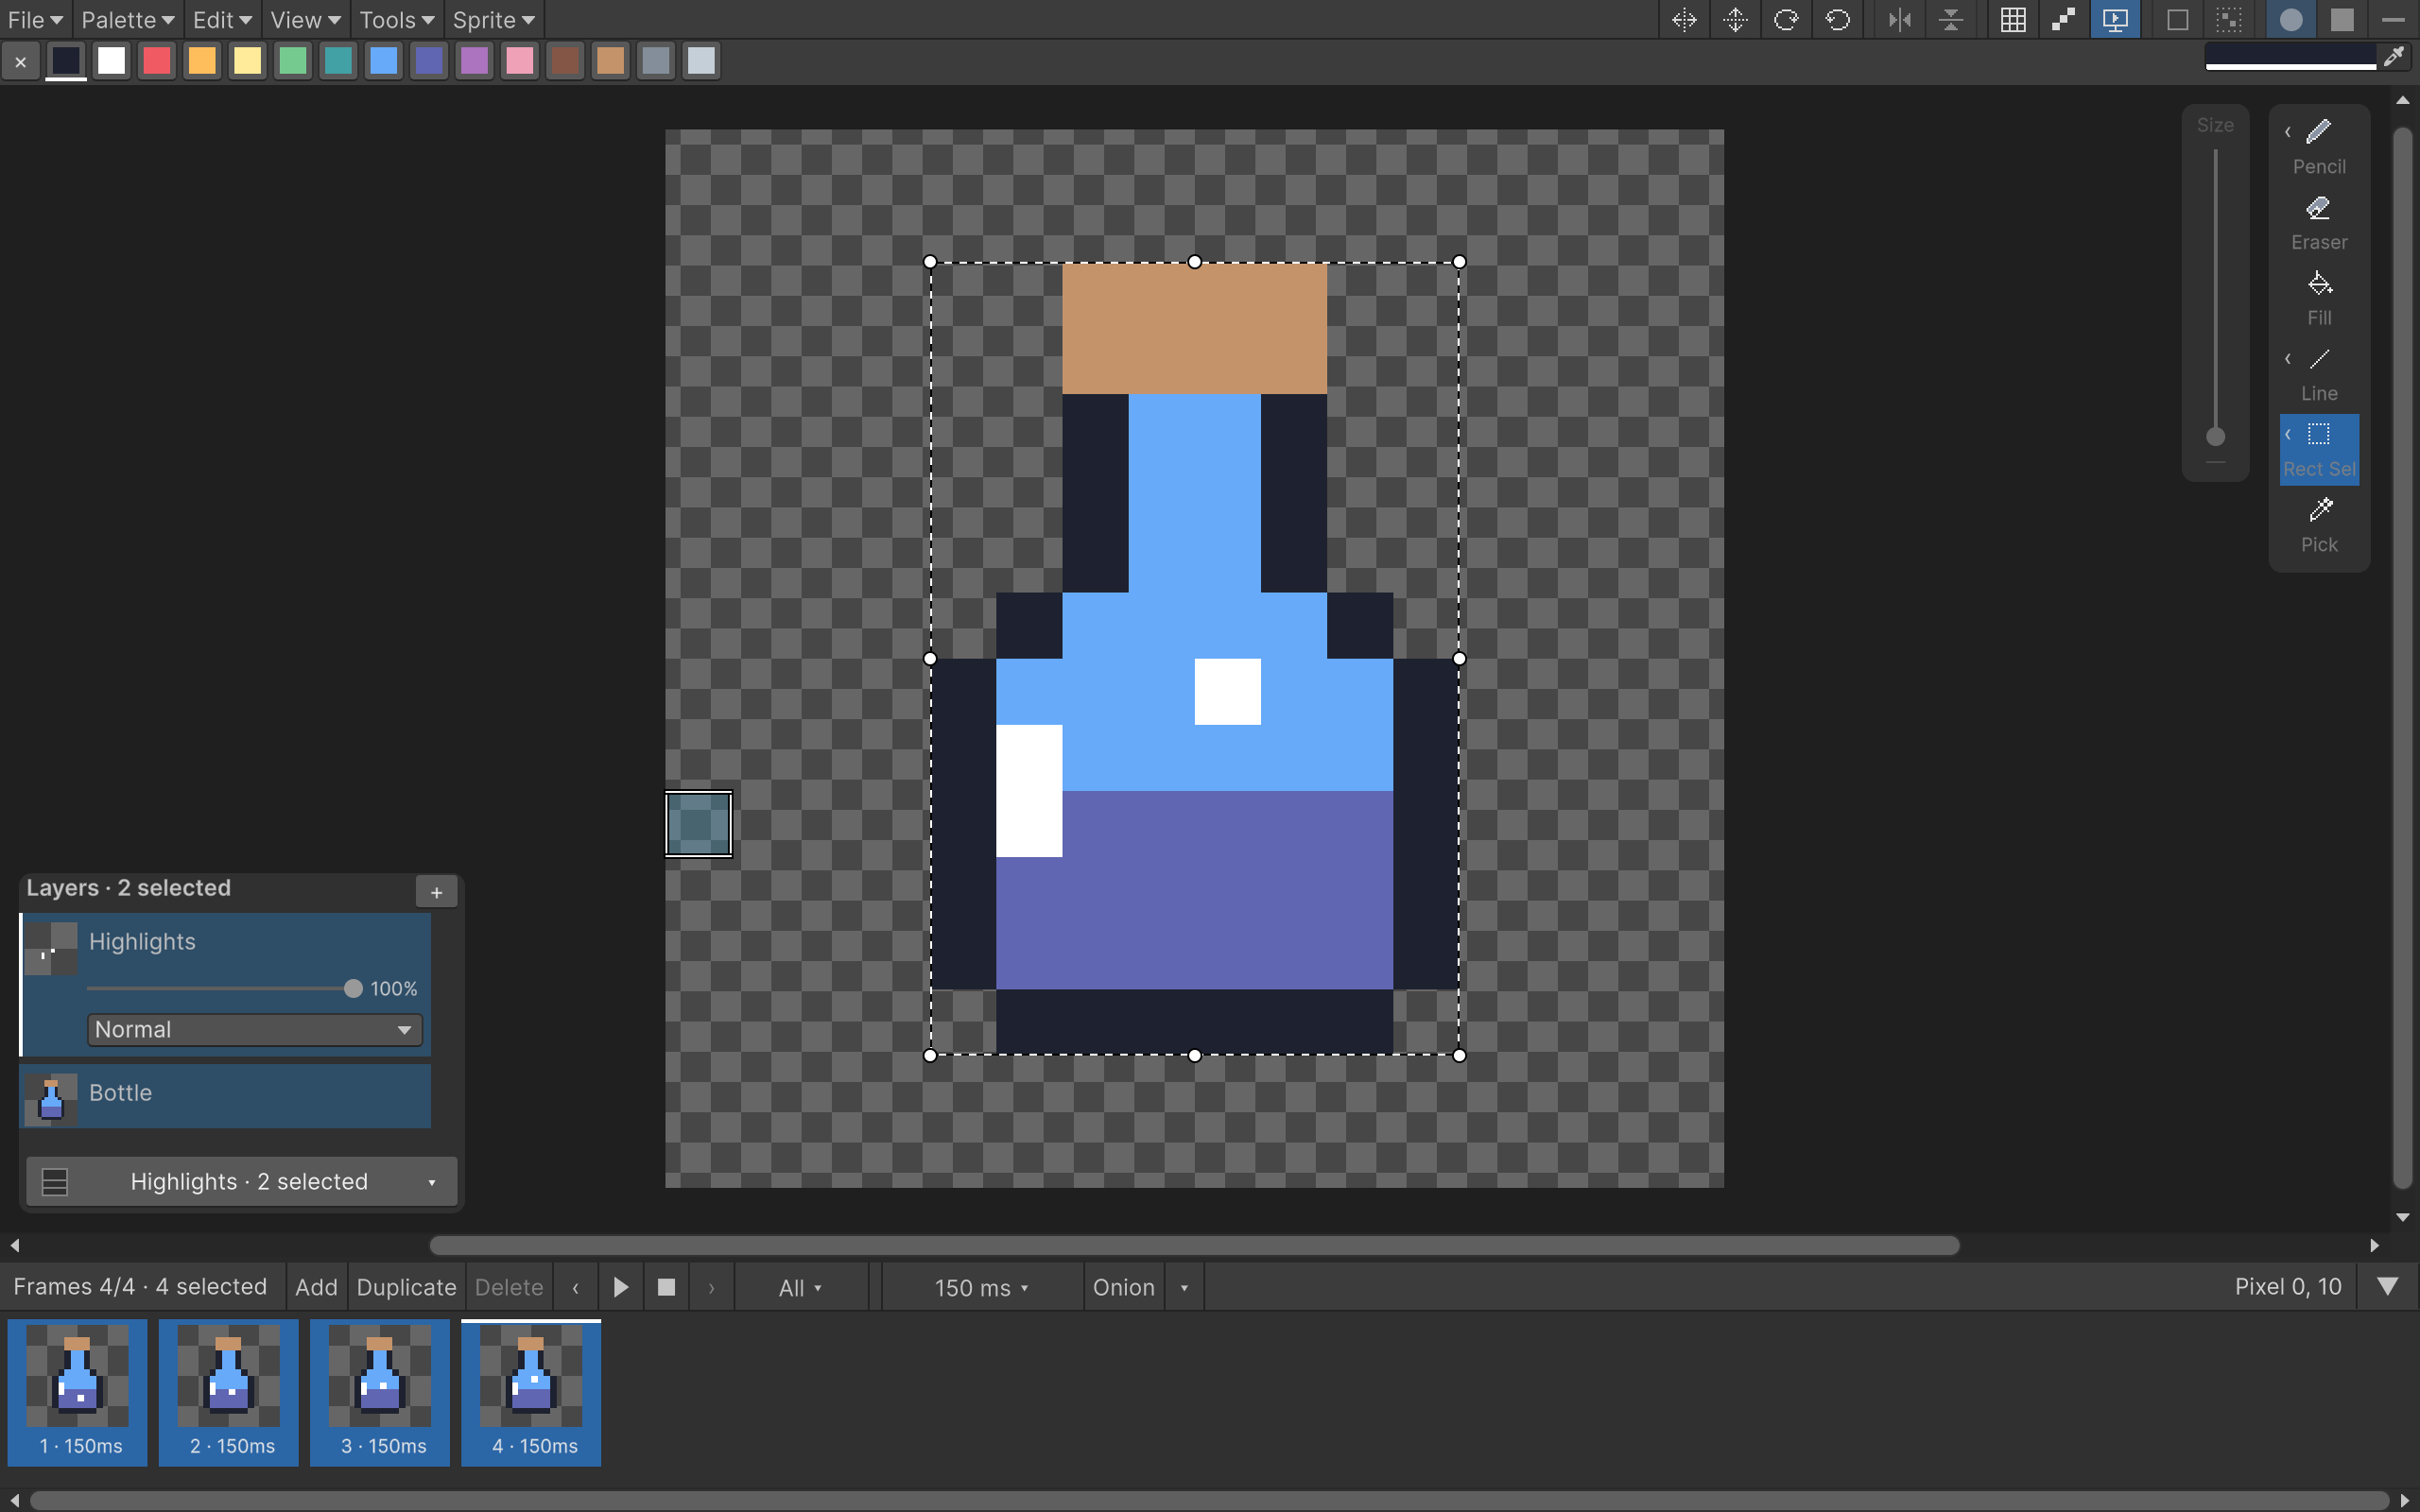
Tutorial: move the whole potion animation
- Open Potion.pixart.
- Click its first frame, then Shift-click its last frame.
- Open Layers. Click Bottle, then Shift-click Highlights to select both layers.
- Choose Rect Select with M and drag around the bottle.
- Drag inside the selection, or press an arrow key, to move the artwork. Each frame keeps its own bubble position.
- Click elsewhere on the canvas or press Escape to keep the result and deselect.
- Step through the frames to check the change. Undo restores the selected targets together.
Resize handles, flips and 90° rotations work the same way. If you only want to move the bubbles, select Highlights alone before drawing the selection.
Paint across an animation
Select several frames and the layer to edit, then paint. The same stroke position and color are applied to each target. This is useful for adding a fixed detail or erasing a stray pixel that appears in several frames.
Without a selection, Flood Fill starts at the same canvas coordinate on each target and follows that target's own connected region. With a selection, it replaces the index at that coordinate across the entire mask on each target. Fill Selection fills the whole mask regardless of color, or the whole frame if nothing is selected. A magic-wand selection works differently: it finds a mask in the active frame/layer and uses that same mask on all selected targets. It does not find a different matching region in every frame.
Palette edits already affect every pixel that uses the edited slot throughout the document, regardless of the selected targets.
Copy and paste across targets
Copy keeps one pixel patch for each selected frame/layer combination; it doesn't flatten them into one image. A moved or resized selection is copied from the pixels it carries. Cut copies those pixels, removes them, and ends the selection.
To paste a multi-target copy, select the same number of frames and layers in the destination. Patches map in timeline order and layer-stack order, not the order you clicked them. For example, a copy from three frames and two layers needs three frames and two layers selected when pasting.
Each copied patch remembers its canvas position, so pasting onto matching targets keeps the original placement. On a smaller canvas, the position shifts inward if needed. A copy from one frame and one layer can be pasted into many selected targets, repeating that patch at the copied position in each. The destination still needs room in its palette for the copied colors; see palettes and clipboard mapping.
Keep the target set deliberate
Hidden or locked selected layers reject the entire edit. Unlock/show those layers or deselect them. Pixart doesn't silently edit only part of the set.
Opacity, blend mode, rename and layer context-menu actions remain per-layer controls. Frame duplication, deletion and timing use the selected frames. Export has its own scope dropdown.
For large batches, reduce the selected frames/layers or work on a smaller area if Pixart reports an editing limit. The gesture budget is shared across the selected targets.